Nicks Mind Portal
Insight into something.
HowTo: Customize Windows Folder Icons in Windows 7
Posted on by Nick Guthrie on October 7th, 2010 | 0 Comments »
I love skinning & customizing everything I use like crazy. One of the things that bothers me the most in Windows is that I always want my icons to look pretty. If I can't visualize something it doesn't exist to me. Having icons with pictures instead of generic folders is hugely useful to me, but it's not that intuitive how to do it. Additionally, if I want to share a folder I want the icon to stay.
Here are default folders on Windows:
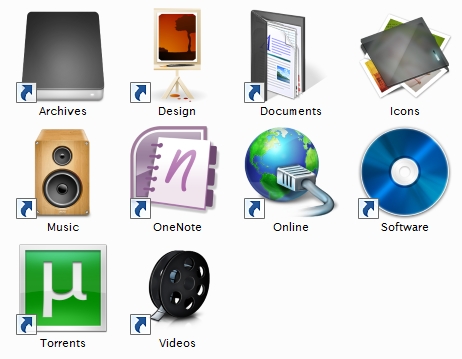
 Here is the same folder but with custom icons:
------------------------------------------------------------------------------
Summary:
- Choose an icon (".ico" file extension) and note it's location (aka "Cool Icon.ico")(no quotes)
- Open the folder and create/copy a "desktop.ini" item which must contain at least:
[.ShellClassInfo]
ConfirmFileOp=0
IconResource=folder.ico
IconIndex=0
- (Setting to folder.ico means it is in the current folder the desktop.ini item is in.)
- To set it to any location Type the full location (WITH quotes):
- "C:IconsCool Icon.ico"
- (include quotes)
- (you CAN include space)
- In either cmd or Windows Powershell:
- Set the attributes of the desktop.ini to a System File & Hidden:
- attrib +H +S "C:Iconsdesktop.ini"
- (include quotes)
- (You might want to) Set the attributes of your icon to hidden
- attrib +H "C:IconsCool Icon.ico"
- (include quotes)
- Set the attribute of the folder to read only:
- attrib +R "C:Icons"
- (include quotes)
- NOTE: You CANNOT change this setting with the right-click & check read-only box, that only changes the contents to read only and does not affect any of the folders (even recursively)
- View Troubleshooting at the bottom for more info
- Set the attributes of the desktop.ini to a System File & Hidden:
------------------------------------------------------------------------------
What you need (prerequisites):
- Notepad++ or any text editor (to view code)
- Download and Install Ico FX
- it is a freeware icon editor (the Photoshop of icons)
- (AND/OR) an icon set or image deviantART.com
- you need your image to be a ".ico" filetype
- Ico FX enables you to turn nearly any image into an icon.
- (GIMP can be a helpful tool to edit pictures but is not required)
Example: Create an Icon with IcoFX
I find the easiest way is to "Batch Process" , even if it is only one item. Here is complete tutorial on how to make a globe into a folder icon, with explanations.------------------------------------------------------------------------------
Part 1: Prepare your Icon:
- Download the image here(save it to your desktop or an easy to get to location)
- Click PNG HI just below the image near the red and green hands
- (it makes your life easier if you rename it to Globe.png or some easy to remember name)
- OR Download & save it from my site (Right Click the image & Select "Save As", then Browse to save to desktop or other easy to access location):

- It is always a good idea to know the license/usage rights of the image you are using, which can be found here , the Terms of Use (aka TOU).
- Click PNG HI just below the image near the red and green hands
- Run Ico FX
- On the top menu, select Tools >> Batch Process.
- Click the "Add" button and add your Globe.png file.
- Select all sizes to insure that your icon will be available in every size.
- (Save to Desktop for convenience)

- Create a folder in your My_Documents Folder, call it Global
- Locate your new Globe.ico (on your desktop) and move it into the new Global folder in your My Documents folder
- Rename your icon Globe.ico to folder.ico
- Open Notepad++
- Save a new file as desktop.ini in your Global folder [.ShellClassInfo] ConfirmFileOp=0 IconResource=folder.ico IconIndex=0 InfoTip="Here are some cool things"
- Save and Exit Notepad++
- In order for Windows to recognize that the folder has changed you need to set the folder to read only. Let us now change the attributes of all of these items.

-----------------------------------------------------------------------------------
Part 2: Properly Set Folder Attributes:
- Open a Powershell
- (cmd or Command Prompt will work well, but Powershell has auto-complete which is nice)
- Start Menu >> Accessories >> Windows Powershell >> Windows Powershell

- (or Open a Command Prompt):
- Start >> type "cmd" (without quotes) (then)>> select "cmd.exe"
- In Windows Powershell Navigate to your My Documentsfolder.
- Type "ls" (no quotes)to view the files in the current directory
- by default you should be in your own user folder
- Type "cd Documents" .
- Type "cd Doc" and hit "tab" to auto-complete (no quotes).
- (fixes typo errors, easier, & faster)
- it will auto-complete to "cd .Documents" (no quotes)
- Type "cd Doc" and hit "tab" to auto-complete (no quotes).
- Type "ls" (no quotes)to view the files in the current directory
- Once you are in your My Documents (aka Documents) folder, Type "cd Global" (no quotes).
- Type "ls" and make sure you see your "Global" folder (no quotes).
- Type "attrib +R Global" (no quotes)
- we are setting the attribute of the folder to read-only
- NOTE: You CANNOT change this setting with the right-click & check read-only box, that only changes the contents to read only and does not affect any of the folders (even recursively)
- You should now see your folder transform into a globe!

------------------------------------------------------------------------------
Part 3: Hide the desktop.ini and folder.ico items:
(following Part 2, you need to be navigated in Windows Powershell to the folder above your "Global" folder- Type "cd Global" (no quotes)
- Type "ls" (no quotes), you should see:
- folder.ico
- desktop.ini
- We want to set folder.ico to be a hidden. We want to set desktop.ini to be a system file and hidden.
- Set folder.ico to be Hidden:
- Type "attrib +H folder.ico" (no quotes)
- Set desktop.ini to be a System File and Hidden
- Type "attrib +H +S desktop.ini" (no quotes)
- Set folder.ico to be Hidden:
Example Complete: YOU SHOULD BE ALL DONE!
- Your should have hidden your items inside & changed your folder to look like a globe.
------------------------------------------------------------------------------
Troubleshooting:
- If you have completed all the steps but nothing happens you should refresh your icons.
Categorized Under
Microsoft WindowsRelated Posts
-

How-To: Fully Reset Icons (Thumbnails) in Windows 7
Sometimes your Icons for one reason or another do not display correctly in Windows. This can be frustrating, and depending on the problem hard to… Read more »
-
HowTo: Customize Windows Folder Icons in Windows 7
I love skinning & customizing everything I use like crazy. One of the things that bothers me the most in Windows is that I always… Read more »